Difference between revisions of "Inoculating Plates and Slants"
(→What's needed) |
|||
| Line 25: | Line 25: | ||
=Take a sample= | =Take a sample= | ||
| − | [[Image: | + | [[Image:Streaking_sampling.jpg|right]] |
Dip the hot needle into the sample. This will cool it off and pick up some yeast. Note that you should not see blobs or drops of yeast on the needle. If this is the case you picked up way to much and you won't be able to spread it enough for district single cell growth. Don't worry if you don't see anything, there will be some yeast on the needle. | Dip the hot needle into the sample. This will cool it off and pick up some yeast. Note that you should not see blobs or drops of yeast on the needle. If this is the case you picked up way to much and you won't be able to spread it enough for district single cell growth. Don't worry if you don't see anything, there will be some yeast on the needle. | ||
| Line 31: | Line 31: | ||
<div style="clear:both;"></div> | <div style="clear:both;"></div> | ||
| + | =Streak onto the plate= | ||
| + | [[Image:Streaking streaking.jpg|right]] | ||
| + | |||
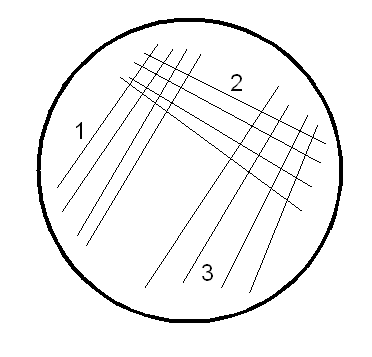
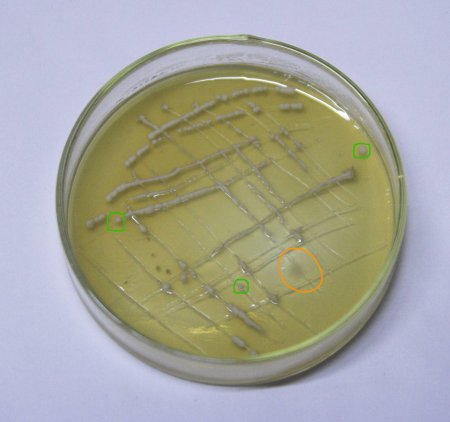
| + | Now pick up the peti dish and streak the needle over the agar surface. A commonly used pattern is the one shown below. Streak area 1 first, then 2 and 3 at last. Don't pick up more yeast between the streakings. If only little yeast was picked up, the yeast cells streaked in area 1 will be spaced far enough for distinct single cell colonies. If more yeast was picked up it may take the streaking in area 3 for the yeast cells to be spaced far enough. | ||
| + | |||
| + | [[Image:Streaking_pattern.gif]] | ||
| + | |||
| + | <div style="clear:both;"></div> | ||
[[Image:Streaking grown plate.jpg]] | [[Image:Streaking grown plate.jpg]] | ||
<div style="clear:both;"></div> | <div style="clear:both;"></div> | ||
Revision as of 03:25, 22 October 2008
These instructions show how to inoculate a plate of malt agar with a yeast sample to grow single cell colonies. This technique allows you to "clean" a suspect sample of yeast by selecting only one or few yeast cells for further propagation.
What's needed
To steak yeast onto a plate you'll need:
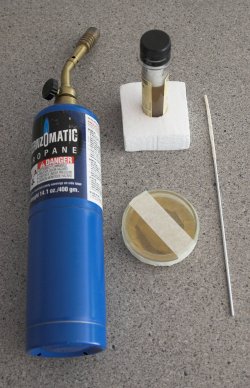
- a flame source for sterilizing the inoculation needle. I use a propane torch, but a gas stove, alcohol lamp or even lighter works as well
- an inoculation needle. A piece of wire works as well, but inoculation needles are cheap and you should pick one up when buying the petri dishes
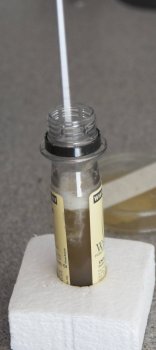
- a sample of yeast. This could be an empty Wyeast smack pack, Whitle Labs vial, dregs from a bottle conditioned beer, an active fermentation, yeast sediment .... In this case I had an old White Labs vial into which I filled sterile wort to get the yeast fermenting again before taking a sample.
- an petri dish with malt agar that has been prepared in advance. (See [Making Plates Slants])
Preparation
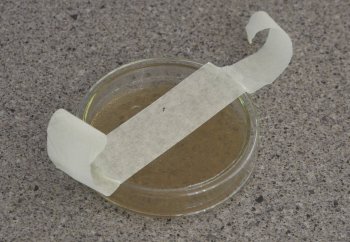
In a draft free room undo the tape on the petri dish and place it on the table. Also open the sample if necessary. Then use the flame to glow out the full length of the needle. This sterilizes the needle.
Take a sample
Dip the hot needle into the sample. This will cool it off and pick up some yeast. Note that you should not see blobs or drops of yeast on the needle. If this is the case you picked up way to much and you won't be able to spread it enough for district single cell growth. Don't worry if you don't see anything, there will be some yeast on the needle.
Streak onto the plate
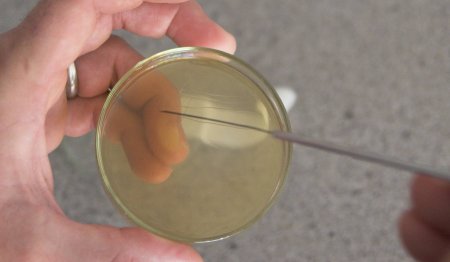
Now pick up the peti dish and streak the needle over the agar surface. A commonly used pattern is the one shown below. Streak area 1 first, then 2 and 3 at last. Don't pick up more yeast between the streakings. If only little yeast was picked up, the yeast cells streaked in area 1 will be spaced far enough for distinct single cell colonies. If more yeast was picked up it may take the streaking in area 3 for the yeast cells to be spaced far enough.

