Making Plates and Slants
Before you can culture yeast, you need to create sterile media (slants, plates, starter volumes, glycol solutions ...) that can then be used to store or propagate yeast.
Contents
[hide]What is needed
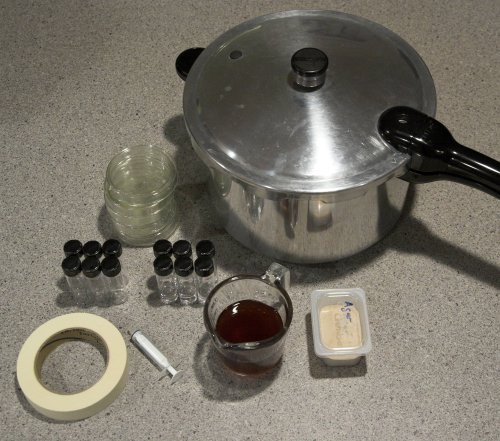
Yeast culturing at home does actually not require a lot of specialized equipment. Here is a list of what is needed:
Hardware
pressure canner
When working with very small amounts of yeasts sanitation will not be sufficient anymore. Sterilization, which means complete elimination of all living organisms, including their sprores, is needed. But this cannot be done by chemical means or boiling at atmospheric pressure. Microbilology labs are using autoclaves to sterilize their vessels, tools and media. An autoclave uses pressurized steam to achieve temperatures high enough for sterilization. Though most home brewers do not have access to autoclaves, the function of an autoclave can easily be achieved with a pressure canner. Not only is a pressure canner much cheaper than an autoclave, it also has its uses in the kitchen and can be used to can starter wort.
When buying a pressure canner, look for a model that works at at least 15 psi. This will produce a temperature high enough for sterilization.
vials
Vials are needed for making slant cultures. Look for ones that are autoclavable. There are various shapes available. A post in a forum pointed me to this source Cynmar. These vials are great for slants and small volumes of culture wort. Another great advantage to slant tubes with rounded bottom (Morebeer) is that they can stand on their own.
petri dishes
If you want to work with single cell cultures or purify a yeast culture, you will need petri dishes. Get the glass ones, which can be cleaned and reused. I use the 75 mm ones from Cynmar. They are large enough to streak out yeast cultures and still fairly cheap.
baby food jars
The glass baby food jars can be used to hold agar cultures or small amounts of starter wort. Now that I have enough vials and plates I don't need them for agar cultures anymore, but still used them to keep sterile wort for the 2nd stage of propagation.
syringe
A small oral syringe (5 ml) works great for measuring the amount of media that is added to the vials and plates. If you don't have small childrden and get them when you buy medicine, ask for them at the pharmacy.
tape
I use painters tape to hold the pretri dishes closed after they have been sterilized and cooled. I also use the tape to give the vials an additional seal and attach notes.
Software
wort
You'll need about 100 - 150ml of 8 - 10 Plato wort (1.032 - 1.040 SG). I use left-over wort from a batch of beer. You can make wort with malt extract, but having it hopped would make it more selective for yeast since many bacterias don't gow in the presence of alpha acids.
agar
Agar is used to solidify the wort. Gelatine may work as well, but I haven't tried it yet. Since Agar is a common vegetarian substitute for gelatine, it should be available at healthfood stores. I couldn't find it there and ordered in from a well stocked home-brew store.
Making Small Starter Volumes
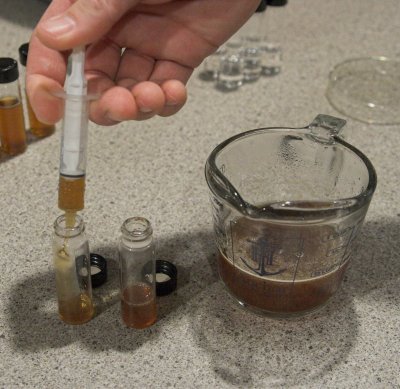
When stepping up from a slant or plate, I noticed that just using boiled wort for the initial steps wasn't sanitary enough and I frequently ended up with spoiled yeast. Because of that I also fill a few of the slants with 10 ml of wort and sterilize them in the pressure cooker. This starter is then either dumped onto a slant or innocilated with yeast from a plate or slant.
Making Slants
For slants and plates agar media is needed. I used about 3-4 % agar by weight:
- 100 ml wort
- 3-4 g agar
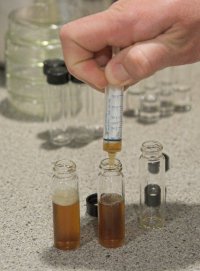
mix this in a heat proof vessel and heat (stove or mircowave) to dissolve the agar. You will notice that it gets thicker. There is no danger in boiling it, but boiling is not necessary at this point. Use the syringe to measure 5 ml of agar into each vial.
Making Plates
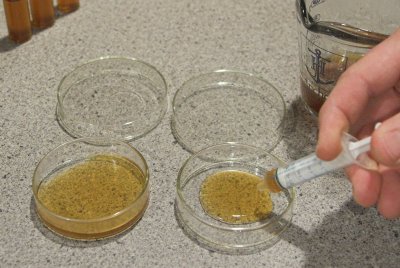
Squirt 10 ml of the agar media into each petri dish.
If you are interested in gowing other microbes than yeast on plates or want to use plates for sanitation tests you can also make a glucose agar media which is not as selective as the lower pH and hopped wort agar media.
Glucose bases media:
- 100 ml water
- 5 g glucose (corn sugar)
- pinch of yeast nutrient and/or Diammonium Phosphate
- 3g agar
Sterilizing
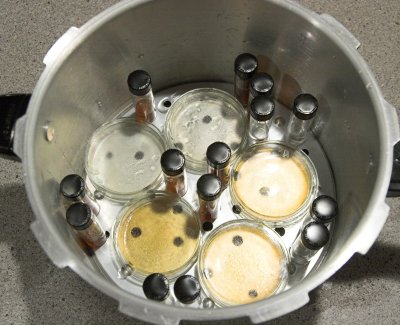
Before you load the pressure canner you need to add some water. There needs to be enough water to last through the 15 – 20 min sterilization process, but not so much that it comes up the sides of the Petri dishes. This may require that you elevate the supporting false bottom that comes with the pressure canner. I can simply insert mine upside-down, which raises it further away from the bottom.
Place the plates and vials on that false bottom. The vials shown can actually stand on their own and will not tip over during the sterilization (at least for me). Once all items that need to be sterilized have been added, place it on the stove and add the lid. But do close the pressure relieve valve yet.
Turn on the head and wait for steam to develop and blow out. Letting some steam blow-out first will replace the air inside with steam, which does a much better job with sterilizing. Now close the pressure relieve valve and wait until pressure builds up. Read the instructions that came with the pressure canner as the procedure is the same as if you would pressure can items.
The pressure has been reached when steam is blown off by the pressure relieve valve. Now wait 15 – 20 min until you turn off the heat or remove it from the burner.
Let the canner cool down on its own and do not try to speed things up by venting steam or placing it into a cool water bath otherwise the media inside the vials may release steam to quickly and causing to spill or burst.
Cooling
Once the canner has cooled enough for the pressure to be gone, open it. Tighten the caps on all the vials and let them cool on the counter. Since there is usually a lot of condensation on the top of the Petri dishes, I like to take the lid off and give it short shake to remove some of the moisture before placing it back on the dish.
To make slants I lay the vial them down onto a chop stick such that the media stops shortly before the top of the vial. This gives me a nicely large surface area later.
Let this cool down for a few hours before you close the Petri dishes with the tape. I also seal the top of the vials with tape. This way I don’t have to worry about any contaminants making it under the cap.
Store
You can store the slants and plates anywhere. Since they have been sterilized, they should not spoil. To prevent drying-out of the slants I keep them in a large zip-top bag.
