Enzymes in the fermenter

You may remember the recent post about the Infinium’s patent pending brewing process and its mention of enzyme extracts in the fermenter. I recently brewed a Hopfen Weisse inspired Weissbier IPA where the wort fermentability was unexpectedly high. I decided that this was an opportunity to test the use of enzymes in the fermenter. So I took about 1800 ml of the young beer after primary fermentation and split it into three 600 ml batches. One became the control, one received an enzymatic malt extract and the last one got some Beano. I heard that Beano has the tendency to create “rocket-fuel” and I wanted to test this.

mashing the enzymatic malt extract

The instructions for the enzymatic malt extract came from this patent for low calorie beer where an enzymatic malt extract is prepared using a 30 min mash at 60 C. This kills most of the bacteria but keeps enough b-amylase active to be useful in the fermenter. Killing bacteria is important since the extract will be added directly to the fermenter without any boiling. I was curious if this really works since spent grain, which is raised to even higher temperatures for longer times during mashing, seems to be loaded with microbes. A fact for which I get a pungent reminder when I open a mash tun I forgot to clean on brew day.

The mash consisted of 70 g milled Pilsner malt and 360 ml reverse osmosis water. I was not too concerned about getting the correct mash pH. After all, I only needed enzyme extraction  and  some level of pasteurization. Set in a water bath I was able to hold a steady temp of ~60 C for 30 min. Temperature control of small volumes is challenging. A well insulated and pre-heated thermos may work too.

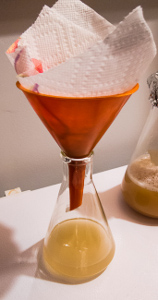
Filtering the enzymatic malt extract

The malt extract was filtered through a paper towel set into a funnel. Its extract content ended up being 10 Plato. This amounts to 75 % conversion efficiency. Not that this efficiency matters much, but I took the extract content of the malt extract into account when calculating the corrected starting extract for the beer. 53 ml of this malt extract was added to the 600 ml beer. About 8% of its volume. There was no science behind this ratio. Too much and I would dilute the beer too much and too little I would not add enough enzymes.

The Beano I used came in pill form and I dissolved one pill in 100 ml water. Beano’s strength is measured in GAU (GlucoAmylase Units). One Glucoamylase Unit (GAU) is the amount of enzyme activity that will liberate on (1) gram of reducing sugar as D-glucose per hour under the conditions of the GA Assay (Vri 511.002). (source http://vitallifeproducts.com). 22 ml of this solution went into one of the beer samples which added about 110 GAU per liter beer.

20 ml water were added to the control to lower its original extract since the other 2 experiments also lowered the starting extract of the beer.

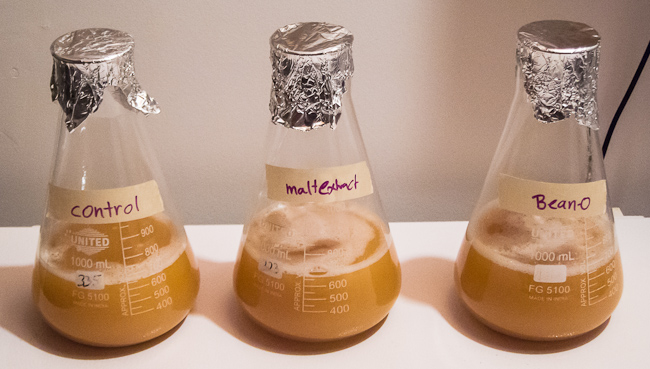
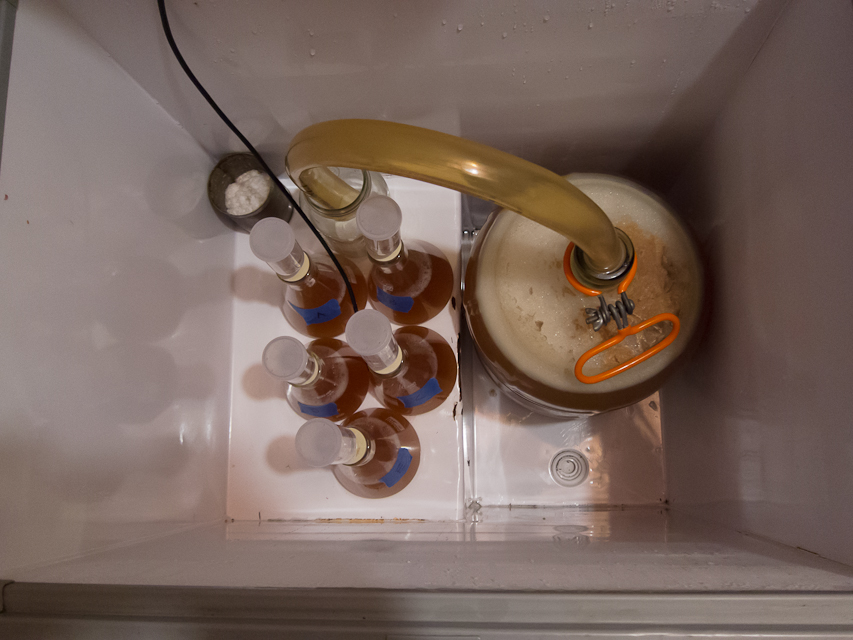
The 3 fermentations immediately after being prepared

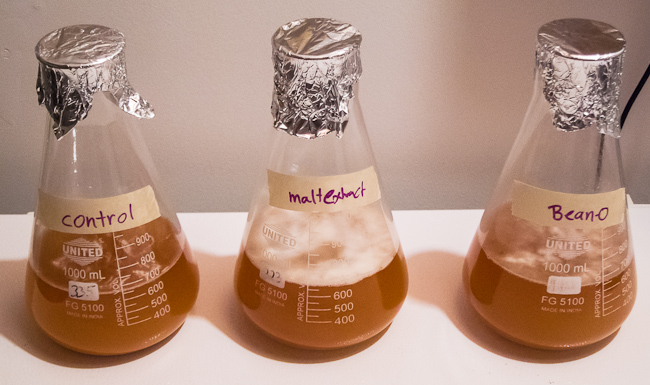
The following morning (about 10 hour later) I noticed strong fermentation activity in the fermentation with malt extract. The Beano fermentation showed some low activity. But since I did not control the actual amount of enzymes that went into each, it is perfectly reasonable that the Beano fermentation ended up will less enzymes than the malt extract fermentation.

10 hours later, the malt extract fermentation shows the most activity

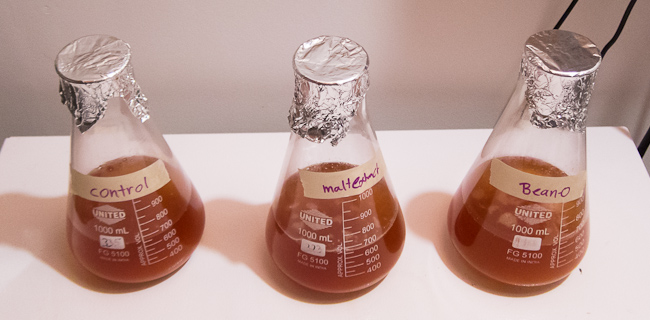
After 9 days I concluded that all fermentations were done and I bottled the beers.

After 9 days

To carbonate the beer I added 4.3 g dissolved table sugar to each 500 ml bottle and some yeast.

I also got an opportunity to measure the current extract and pH. Most importantly I was able to taste uncarbonated samples. Here are the stats:


control malt extract Beano
corrected starting extract 17.8 17.7 17.7 Plato
days fermented 9 9 9 days
Final extract 4.3 2.5 2.2 Plato
ADF 75.9% 85.9% 87.6%
pH 4.48 4.4 4.35

As expected the addition of enzymes boosted attenuation. Beano seems to digest more dextins than a malt extract. I wonder to what extent the difference is caused by limit dextrins (1-6 glucose links), which can only be broken by limit dextrinase, an enzyme which likely did not survive the 30 min mash at 60 C. Beano’s glucoamylase is likely able to cleave both the 1-4 and the 1-6 links found in starch leaving only glucose and no limit dextrins.

It was surprising, however, that even with enzyme use during fermentation the apparent attenuation stayed in the mid 80’s. This suggests that the low wort fermentability may not have been the result of incomplete starch and dextrin break-down during the mash. After all, I was going for very fermentable wort and held 30 min rests at 55 C, 63 C and 65 C followed by a 45 min rest at 72 C. I was expecting to get an attenuation limit in the high 80’s with this mash schedule.

There was also a drop in pH. I contribute this to the extended fermentation activity, which was longer for Beano compared to the malt extract.

So much for the metrics, here are some brief tasting notes:

control: No noticeable off flavors. While this was a Weissbier yeast, it is a yeast that produces only limited amounts of phenolics. The mouthfeel is rather thick and the beer does not have the refreshing IPA character that I was going for

enzymatic malt extract: No off flavors. Whatever surviving microbes came in from the malt did not take hold and spoil the beer. I’ll have to see how this develops as the beer sits in the bottle for a month. The mouthfeel was much lighter and more  easy drinking than the control. This was the taste I was shooting for.

Beano: No off flavors either. The mouthfeel was even lighter than the malt extract version. But it was not the dreaded “rocket fuel” that others have gotten from Beano before. I think this version felt a bit too thin in its taste, though. I’ll have to defer to tasting a carbonated sample.

Conclusion

I think enzymatic malt extract in the fermenter works. It appears to be a viable option for creating highly attenuated high alcohol beers and I plan on using it on a full size batch in the future. I don’t know if it is a practical option for fixing low wort fermebtability in lower gravity beers since they may become too thin. After all, the enzymatic reactions will continue until all substrate, i.e. dextrines,  is gone.

Hops From A Can

Many brewers scoff at the idea of using hop extract. After all, it represents what’s wrong with industrial brewing these days: finding ways to cut corners and save money. For these purists even pellet hops are too much processing and only whole flower hops should be used. In a hypocritical move, the same brewer may also be adding anti-foam or mash pH stabilizer during the brewing process.

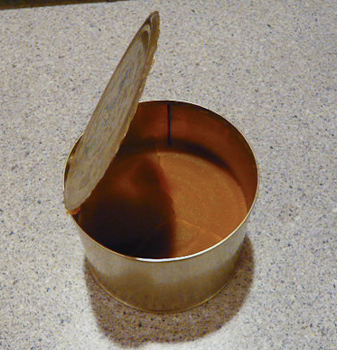
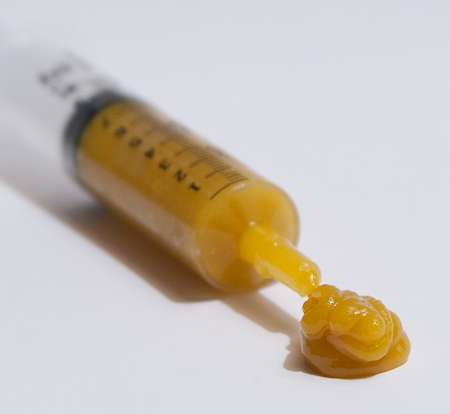
Hop extract is a processed form of hops. The two types that are allowed in German brewing are CO2 and Ethanol extracts. Because they use fermentation CO2 or ethanol, respectively, they comply with the Reinheitsgebot (purity law). Due to the extraction of chlorophyll, Ethanol hop extracts have a green color. CO2 extracts, on the other hand, appear yellow and seem to be more commonly in use. Both types of extracts contain the hop’s resins and aromatic oils.

Hop extract in a can

Hop extract in a can

One of the major benefit of hop extract to the home brewer (and commercial brewer) is the lack of vegetative matter. This means more alpha acids can be added to the boil without increasing hop trub. The other benefit of it is the reduction of polyphenols extracted from hop vegetative matter. According to Narziss/Back (German brewing authors) this leads to a cleaner bitterness. CO2 extracts don’t contain any hop polyhenols while Ethanol extracts contain some.

I got my hop extract as a 150 g alpha-acid can for $15 through a club bulk buy from North Country Malt.  I only knew the amount of alpha acid in the can and the alpha acid percentage of the extract had to be calculated based on the weight of the extract. In the end I determined that there are 54% alpha acid in the extract. Copying Northern Brewer’s Hop shot, I ordered 25 10 ml syringes to store the hop extract. The syringes were filled with hop extract heated in a water bath.

When using hop extract I squirt it onto a piece of aluminum foil while weighing it. The hop extract is then added to the wort at start of the boil. It slides right of the foil when held into hot wort. It has been my experience that the extract’s bittering “power” is not as much as pellet hops. That might be a result of the smoother bitterness or the fact that it doesn’t mix as well with the wort as pellet hops do.  After chilling I can see a lot of resin beads on the side of the kettle. Because of this I use bout 10-20% more alpha acid with hop extract than I would use with pellet hops. Your mileage may vary and you’ll have to experiment.

If you don’t want to buy a can of hop extract yourself, you can try Northern Brewer’s Hop Shot. They appear to be the only home brew store that sells hop extract.

CO2 hop extract

Yeast pitching by weight

For a while now I have been tracking yeast propagation data in a big spread sheet. But not every yeast propagation gets logged in there since I don’t always bother about taking cell counts.

However, I do have a few data points that are of interest when it comes to pitching yeast by weight and calculating starter volumes. The latter I’ll save for another day.

The idea of pitching by weight relies on having reasonably accurate idea of the cell count per gram of yeast slurry. With this the cell count can be estimated from the yeast slurry’s weight. Weighing of propagated yeast is simple if you know the weight of the propagation vessel (for most brewers that will be an Erlenmeyer flask). It’s a good idea to mark the empty weight on the flask. You should also note the weight of the stir bar if you are using one. You should stir your starters.
Simply decant the spent starter beer until left with yeast sediment and stir bar. This works best with strains that floculate well. Weissbier yeast, for example doesn’t settle into a dense sediment and you’ll loose some slurry during decanting or have to leave a fair amount of starter beer in the sediment.
Then weigh the flask, subtract flask and stir bar weight and you have the yeast sediment weight.

That also works for washed yeast. If you don’t wash yeast and want to use the yeast sediment from a primary, turn the carboy upside down and let the yeast drip into a sanitized cup or beaker.

But how much yeast is in that sediment?

Here is some data I have:

  • freshly propagated WLP 830 sediment contains about 4.5 Billion cells per gram. I have 4 data points ranging from 4.0 to 4.9 B/g. My starters have very little trub since I use leftover wort that has already been boiled for 60+ min
  • harvested WLP 830 contains about 2.5 Billion cells per gram. I don’t get much trub into the fermenter. Virtually no hot break and maybe 50% of the cold break.
  • I have only two data points for freshly propagated WLP 833. The average is 3.8 B/g. This can safely be rounded up to 4 B/g
  • WLP 001 and WY 1272, both American Ale type yeasts, showed about 2.5 B/g in freshly propagated yeast sediment. These yeasts flocculate well and the sediment was as dense as the sediment for WLP 830/833. The yeast cells might just be a bit bigger than lager yeasts. I haven’t compared them under the microscope.
  • The only top crop data I have is for WY1272 and that showed 2.7 B/g, which is close to the freshly propagated sediment. I would expect that washed yeast sediment has about the same density.

That’s all the reliable data I have. I have used English ale yeast (WLP 002), but that one flocculates so strongly that I was not able to count yeast cells.

The little data I have suggests that clean lager yeast sediment contains almost twice the number of yeast cells than comparable ale yeast sediment and that harvested sediment has about 60% the cell count of clean sediment.

Feel free to use these numbers as guidelines and keep in mind that being off from the actual yeast count by +/- 25% should not be a big deal. Most pitching rate experiments where brewers evaluated under and over pitching where done with 0.5x, 1x and 2x the recommended pitching rate or an even greater spread.

If you have sediment density data of your own, that you are willing to share, feel free to do so.

Bottled this year’s Doppelbock tonight

Tonight I finally go around to bottling this year’s Doppelbock. I didn’t get to brew it until rather late. But what’s more important is that I started a repeat of the Doppelbock flavor and yeast experiment. Three 12 oz bottles were dosed with about 0.5 loose WLP 830 slurry. I estimate that this amounts to about 1-2 Billion cells. Three bottles are kept as control. In addition to that I purged the head space of 4 additional bottles with O2. Two of these O2 bottles also got 0.5 ml yeast sediment. The idea is that if the desired Doppelbock flavor is caused by oxidation, it should appear sooner in the bottled with O2 but no yeast.

Now I have to wait. I think I’ll crack the first bottles in about 3 months. The beer tastes good now. It’s clean and higher alcohols are low. But it is still missing this deep “dark malt” flavor.

I encurage others to try a similar experiment when bottling a beer, that’s to be aged, from a keg.

Five Things That Made Brewing Easier For Me

Most experienced brewers will have a list of things that made their brewing easier. And this list will not only change from brewer to brewer, brewers will also disagree on the value of certain techniques. Here is my list in no particular order. Feel free to disagree:

(1) Thinner Mashes:

Through German brewing texts I was introduced to thin mashes very early on. From a practical point they are easier to stir and do a better job at holding their temperature. From a beer quality point they force the brewer to less sparging and thus less extraction of unwanted husk compounds. And from an efficiency point of view they convert faster and more complete than thick mashes. I really miss the latter when I brew my Doppelbock, which needs a thicker mash due to the higher gravity and my limited mash-tun space

(2) settling trub before racking

The earliest problem I had in brewing was trub clogging the screen of the plastic funnel I was using to fill wort into the carboy.I was about to invest into a large conical screen from a restaurant supply house until I found the whirlpool technique and let the trub settle before racking. This was a big step towards more enjoyable brew days. Nowadays I don’t whirlpool anymore but let the trub settle while the kettle sits in an icebath in a large tub. The ice bath chills the wort to pitching temp after I brought it into the mid 20’s (Celsius) which is around 80 in Fahrenheit.  The tub and the kettle are elevated so that I can siphon the cooled wort directly into the carboy.

(3) Brew More Than Needed And Save The Rest For Starters

This goes along with letting the trub settle. In order to not pick up trub during racking about 2-4 qt of wort need to be left behind in the kettle. In my brewing this wort does not go to waste. I’ll filter this sludge overnight through a paper towel set on a screen in a large funnel. The next morning the clear wort is filled into 2 l soda bottles and stored in the freezer. When I need starter wort, and I always need starter wort, I thaw and boil to frozen wort. I haven’t bought DME in years. Another advantage of brewer’s wort for starters is that it has already been boiled and doesn’t boil over as easily or create a lot of hot break.

(4) track pitched yeast amounts by weight

One part of consistent brewing is pitching consistent amounts of yeast. For a while I determined the yeast amount by settling yeast in a graduated cylinder. But that requires a number of yeast settling steps if the cylinder holds only 250 ml but the propagation volume was 2000 ml or even larger. In a forum discussion I was pointed to weighing the yeast sediment instead. So I noted the empty weight on all my flasks and after propagating the yeast I simply settle the yeast in the fridge and then decant the spent starter wort. The flask with yeast sediment it weighed and its empty weight plus stir bar weight is subtracted. From cell counts I know that there are about 4.5 Billion cells per gram of freshly propagated yeast sediment, at least for my most favorite lager yeast (WLP 830).

(5) siphon from keg to keg under pressure.

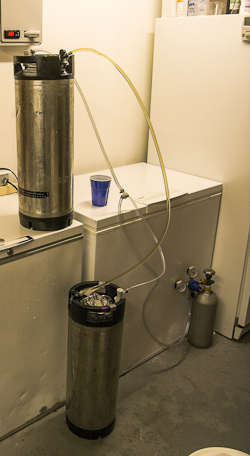
When I started out performing secondary fermentation and cold conditioning in kegs, transferring carbonated beer from one keg to another was a chore. I like to carbonate beer during secondary fermentation or cold conditioning b/c the beer is ready to drink once that process is done. The problem of transferring carbonated beer is that it has to happen under pressure. Initially I was doing this with a bleeder valve on the destination keg with which I would regulate the pressure in that keg while the beer is pushed in by pressure applied to the source keg. But with this set-up you cannot leave or must not forget amount it otherwise foam will come out of the bleeder valve when done. Then I found a post in a German home brewing forum that mentioned how to siphon beer under pressure: place the source keg higher than the destination keg. Connect both keg’s CO2 outlets with a CO2 line. Then connect the beer out lines with a beer line. Now vent the destination keg a little to get the siphon started (the CO2 line may have to be disconnected briefly). Since this is a simple siphon, that will stop when all beer has been transferred, you may leave and check back in 30 min. 30 min during which I can do something else and don’t have to worry about foam being spewed across the basement floor.

patent pending brewing process for Infinium

Infinium is collaboration between the Boston Beer Company and Weihenstephan brewery in Freising Germany. I had the beer once at a club meeting and didn’t think it was all that special. What interested me more, though, was the novel brewing process for which Boston Beer filed a patent application.

The problem in making a light high alcohol beer that complies with the German Purity Law (Reinheitsgebot) is that it has to be made from all malt and can’t use sugar to increase alcohol without adding body. Normal brewing procedures, even if aimed at high fermebtability, leave too much dextrins which would add too much body to the beer.

After not being able to find the patent or application on my own I asked around in my brewing club, with success:

United States Patent Application 20110274785 – METHOD AND SYSTEM FOR PRODUCING A MALT BEVERAGE HAVING A HIGH DEGREE OF FERMENTATION

The wort is brewed with a stepped mash that isn’t out of the ordinary. The patent application mentions long (150 min) rest at 63 C before a mash -out at 72 C is done. This will already produce a highly fermentable wort. Key to even higher fermentability, however, is the preparation of an enzyme rich solution from what they call “green” malt.  “green” malt, also known as air-malt is malt that has been germinated and dried, but not kilned. The absence of high temperatures ensures that it is extremely rich in enzymes.

The enzyme rich extract is prepared my mashing the green malt at 57 C to preserve limit detxtrinase and b-amylase. The temperature is high enough to kill most micro organisms. The resulting supernatant can be added to the 65 C first wort in the kettle where the enzymes are able to continue to break down dextrines that were not broken down in the mash.

This by itself does not yet lead to a satisfactory fermentability and 24 hrs after the addition of the yeast another green malt mash is prepared. This time the supernatant is added to the fermenting beer where it is able to break down more residual dextrines w/o the enzyme life being cut short by the head of a mash or a boil. The patent appilication claims that all these processes can lead to a beer with an attenuation of 96%.

While this process seems fairly ingenious, a number of similar patents have already been issued. A simple patent search for “low calorie beer”, the main application for enzyme additions in brewing, lead me to this old Anheuser Bush patent:

United States Patent 4,272,552 – Process for producing a low carbohydrate, low calorie beer

It also talks about adding the enzyme rich supernatant from a secondary mash to fermenting beer in oder to lower residual extract or boost fermentation. The key difference to Boston Beer’s patent application is the use of green malt by Boston Beer. But I don’t think that this is all that crucial and that an Infinium like beer can easily be brewed without green malt.

In addition to that at what drying temperature is malt no more “green” malt but kilned malt?

The effect of zinc on fermentation performance

This is the 2nd series of experiments regarding the effects of various additives and fermentation conditions on fermentation performance and beer quality. This time I wanted to take a closer look at the impact of various levels of zinc additions on fermentation performance.

Zinc is an important co-factor in many enzymes and thus a requirement for yeast growth. Most yeast strains require 0.1 – 0.2 mg/l of zinc. Zinc levels greater than 0.6 mg/l can inhibit yeast growth (Priest, Handbook of Brewing).

Zinc may be the only yeast nutrient that even barley malt is deficient of. As a result fermentation performance may benefit from the addition of zinc. This is why I conducted this experiment.

In the end I was not able to find any significant difference between the control fermentation and the 4 different levels of zinc additions with the exception of yeast growth. The most yeast growth was observed for the fermentation that added 0.2 mg/l zinc. This would agree with the literature which mentions possible yeast growth inhibition at total zinc levels above 0.6 mg/l.

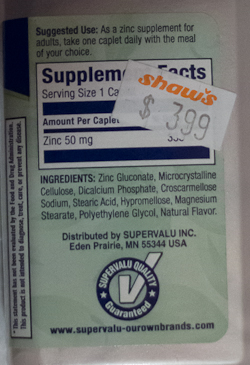
The absence of other differences may be because the wort (98% Pilsner malt wort) contained sufficient zinc for the yeast that was used (WLP 830) or that the yeast was not able to utilize the zinc that was added (in this case the yeast growth differences would have to be attributed to a random error). The zinc came from simple 50 mg zinc tablets that are available as dietary supplements in a grocery store.

Details of the experiment

The wort that was used was left over from a Pilsner brewed with

  • 96% Best Pilsner Malt
  • 2% Weyermann Sauermalz
  • 1% Weyermann CaraMunich I
  • 1% Weyermann CaraPils

Mashed with a Hochkurz mash

  • 30 min at 65C
  • 45 min at 72 C
  • 15 min mash-out

moderately hopped with FWH Saaz and 60 min boil addition of hop extract

It was boiled and cooled before a stir plate and O2 were used to achieve a wort oxygen content of ~12 ppm. WLP 830 yeast was then added and allowed to un-flocculate completely before the pitching rate was determined with a hemocytometer. The pitching rate was about 9 Millon cells per ml.

About 413-125g of this pitched wort were poured into 5 500 ml Erlenmeyer flasks. In order to eliminate the effects of settling yeast during this process flasks were filled in random order and the cell density in the remaining wort was also determined. That cell density was around 10 M/ml. As a result there was no significant yeast settling that may have lead to different pitching rates.

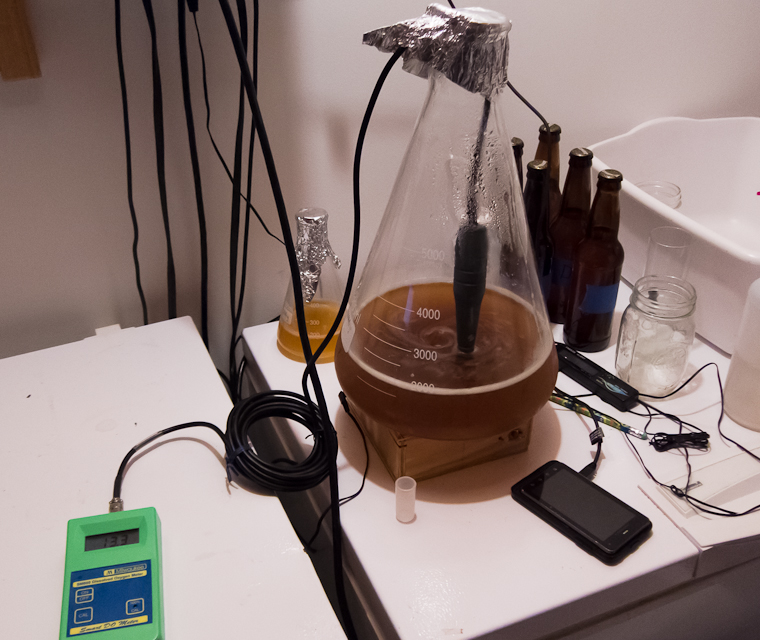
Wort oxygenation while the oxygen content is monitored with a dissolved oxygen meter

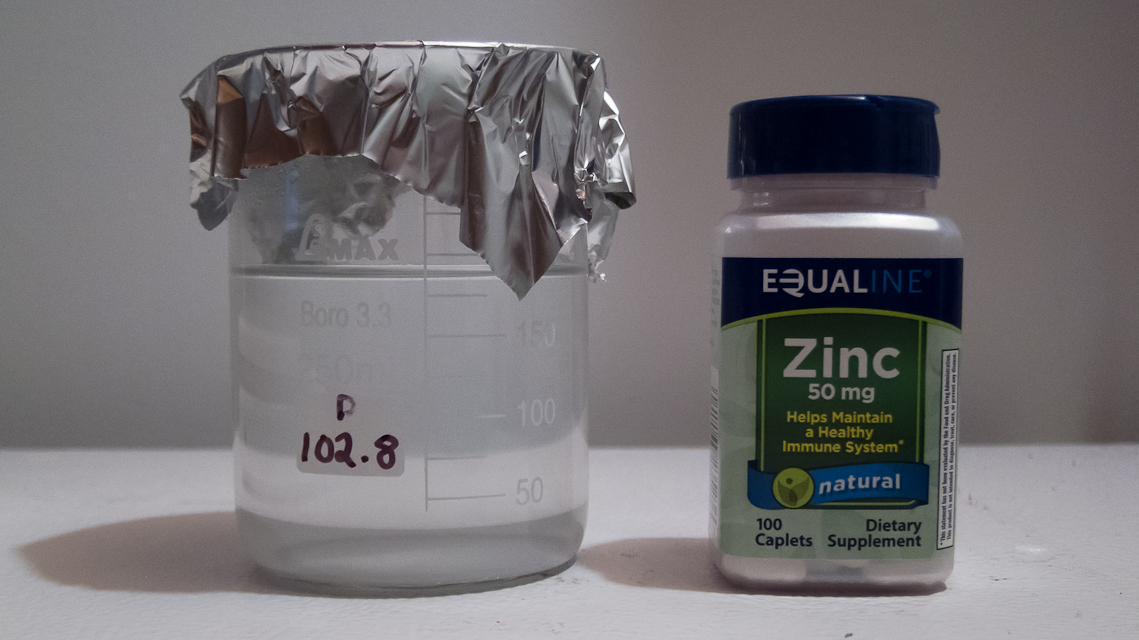
To provide varying levels of zinc additions a 50 mg zinc tablet was dissolved in 185 ml water resulting in a 0.27 mg/ml solution. 0, 0.3, 1, 4 and 8 ml of this solution were added to the 5 different fermentation resulting in 0.0, 0.2, 0.7, 2.6 and 5.1 mg/l of zinc addition, respectively. To keep the addition of water the same DI water was added such that the water addition was 8 ml for each fermentation.

Zinc solution and Zinc tablets

The flasks were sealed with an airlock and their initial weight was determined before they were placed into a temperature controlled freezer chest. The initial ambient temperature was 7.5 C and was later raised to 11.8 C.

All five flasks in the freezer chest with the temperature probe in their middle

The flasks were weighed about twice per day for 15 days until the weight loss stabilized. At that point the extract content of the beer was determined with a precision 0.990 – 1.020 sg hydrometer before the beer was filled into a bottle along with 1.9 g of sugar and some of the yeast sediment.

The yeast sediment remaining in each flask after all beer was decanted was determined by weighing the flask and subtracting the empty weight of the flask.

About 1 oz of beer was left over which used to measure pH and these samples were also tasted.

These are the various metrics that were collected for all 5 fermentations:

test name A B C D E
zinc added 0.0 0.2 0.7 2.6 5.1 mg/l
stating extract 11.6 Plato
attenuation limit 78.4% ADF
yeast strain WLP830
yeast source Pils Fast Ferment Test sediment

yeast age 1 day
fermentation type still, airlock
starting O2 12.4 mg/l
pitching rate 9 M/ml
fill order 1 5 4 3 2
extract drop per day 1) 1.3 1.3 1.3 1.3 1.3 Plato
final extract 2.8 2.8 2.8 2.8 2.8 Plato
ADF 75.9% 75.9% 75.9% 75.9% 75.9%
attenuation delta 2.5% 2.5% 2.5% 2.5% 2.5%
yeast sediment weight 8.0 9.0 8.3 7.7 7.2 g
pH 4.50 4.55 4.55 4.55 4.53

1) refers to the extract loss per day during the most intense part of the fermentation and was determined from the slope in the fermentation profile

And the fermentation profile:

fermentation profile as percent weight loss over time

For some reason the “+8 mg/l Zn” fermentation showed a larger weight loss (measure of lost CO2) then the other fermentations, but that did not show up as higher attenuation or lower final extract. It is not known what could have caused this increased weight loss.

The fermentation metrics for all 4 beers are very much the same. The most yeast growth was achieved for the “+0.3 mg/l Zn” fermentation, while higher additions led to less yeast growth. This might be an result of total wort zinc levels in excess of 0.6 mg/l which is known to inhibit yeast growth. This yeast growth inhibition did not affect other fermentation parameters like extract drop per day during the most intense part of fermentation.

There were no taste differences that I detected between the beers. Tasting of samples was done after the measurements were taken and my taste perception could have been influenced by my expectation that there would be no difference.

It is possible that the zinc had no effect and that the yeast sediment weight differences are the result of a random error. On the left is a picture of the ingredients label. Zinc is present in these caplets as Zinc Gluconate which may not readily release Zn2+ into the wort. The use of zinc chloride would have been more reliable, but I didn’t have that at hand. Maybe for a later experiment I get ZnCl2.

Pitching Rate Experiment – Tasting

After about a week of being carbonated at room temperature and a few days in the fridge I tasted the beers fermented with different pitching rates. All beers carbonated well.

But first a few stats that I also collected: pH an foam stability. Below in bold:


test name A B D C E

stating extract 13.1 Plato
attenuation limit 80.0%

yeast strain WLP830 from slant

yeast source Bo Pils FFT

yeast age 2 days
fermentation type still, airlock, in 500ml flask

fermentation temp 18 C
starting O2 7.2 mg/l
pitching rate 32 23 15 9 2 M/ml
extract drop per day 1) 3.5 3.7 3.7 3.0 2.8 Plato
final extract 2.7 2.7 2.7 2.8 2.9 Plato
attenuation delta 0.6% 0.6% 0.6% 1.4% 2.1%

yeast growth 36.0 30.7 37.5 33.9 29.3 B
growth per extract 0.77 0.66 0.81 0.72 0.63 B/g
pH 4.28 4.37 4.50 4.43 4.60

foam 7:06 12+ 11:20 12+ 10:25 min

The pH of the beer behaved as expected: The more aggressive the fermentation the larger the pH drop and the beer with the most aggressive fermentation was the one with the highest pitching rate. I was a bit surprised by the magnitude of the beer pH difference.

Foam stability is where I pour the beer straight into a Koelsch glass until the foam reaches the top and then I measure the time it takes for the layer of bubbles to collapse, break and reveal the surface of the beer. These numbers are not very repeatable and can be very random. Everything above 7 min is pretty good. The test is designed to detect major deficiencies in foam stability.

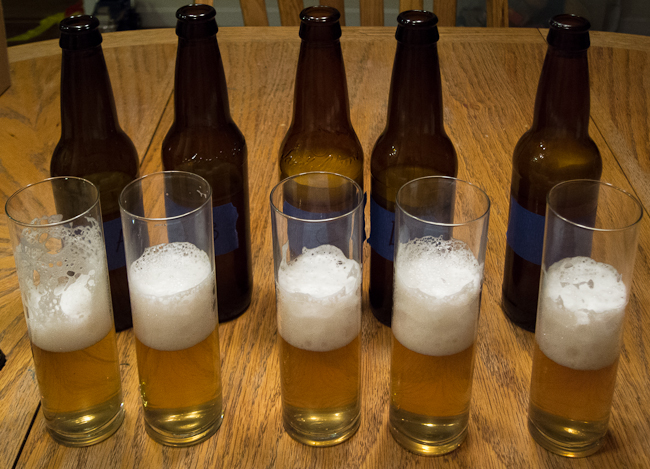
The 5 beers a few minutes into the foam stability test

The 5 beers a few minutes into the foam stability test

As for the taste differences, all beers tasted very similar. I did the tasting knowing which beer was which and it appeared to me that beer A, the one with the highest pitching rate, had a more estery taste and aroma than beer E, the one with the lower pitching rate. The lowest pitching rate beer seemed to have the cleanest aroma but also appeared more bitter and exhibited a thinner mouthfeel.

The literature reports that ester production is connected with yeast growth and the more the yeast is able to grow the less it will produce esters since the ester precursor Acyl CoA is used for yeast growth. However, the amount of yeast sediment produced by each fermentation suggested that the most yeast growth happened for the beer with the highest pitching rate.

In the end, this is just another data point for the effects of pitching rate on fermentation performance and beer quality.

Kai

Pitching Rate Experiment

I finally got around to conduct a new set of experiments. These experiments focus on fermentation. Rather than brewing full batches of beer and change parameters I’m using wort left over from full size batches to run a few small scale fermentation experiments.

The first set of experiments focused on pitching rate. Since pitching rate is a parameter that has been evaluated by many brewers I didn’t expect too many surprises. I was mostly interested in testing my approach, in particular using the weight change of the fermenting beer as an indicator of the progression of fermentation. This weight drop is the result of escaping CO2.

300 ml of 12 Plato beer contain about 36g of extract. With an apparent attenuation limit of 80% about 66% or 23.8g of this extract is fermentable. About 1/2 of its weight is converted to CO2 of which the majority escapes. This means during fermentation the beer looses about 11g or 4% of its weight. This weight loss can easily be followed using a scale with an accuracy of 0.1 g. The scale I use is a cheap kitchen type scale with a capacity of 2 kg and a precision of 0.1g. It has shown excellent repeatability of weight measurements.

Setup

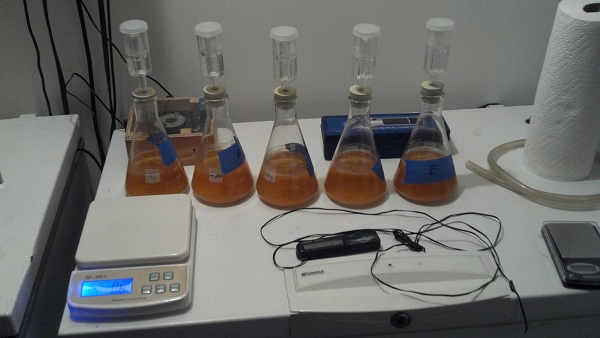
For this experiment WLP 830 yeast sediment from a fast ferment test was added in different amounts to about 355g of 13.1 Plato Pilsner wort. The wort was aerated to about 7.2 ppm O2 before it was divided into the individual 500 ml flasks for the experiment. The yeast was brought into suspension and pitching rates were determined though cell counts.

The beer was not agitated during fermentation and the flasks were closed with an airlock. The mean ambient fermentation temperature was 18 C. Weight measurements were taken twice daily. After 7 1/2 days, once the weight stabilized and approached the expected weight loss, the extract was measured using a hydrometer and the beer was filled into individual 12 oz bottles. Sugar syrup and some yeast was added to carbonate the beers.

To asses the level of yeast growth that happened during fermentation all beer was decanted from the flask and the flask with sediment was weighed. The empty weight of all flasks used was known and hence the weight of sediment could be determined. To estimate cell count a sediment density of 4 Billion cells per gram was assumed. This is a number that I found true for yeast sediments from fast ferment tests or yeast propagation.

Results


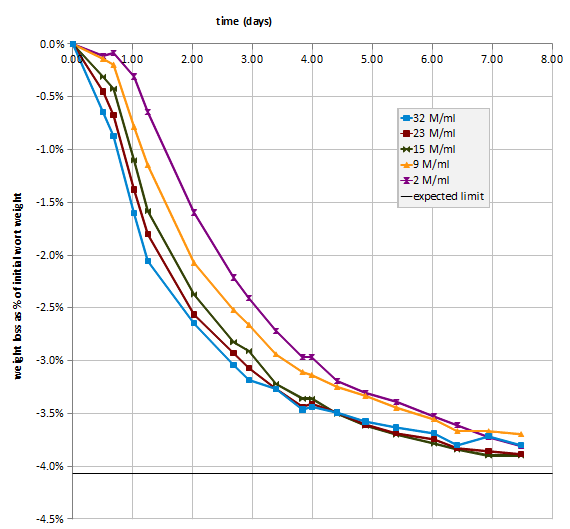
The following chart shows the beer’s weight drop (in %) during fermentation for all 5 pitching rates:

The following table shows metrics that were measured

test name A B D C E
stating extract 13.1 Plato
attenuation limit 80.0%
yeast strain WLP830 from slant
yeast source Bo Pils FFT
yeast age 2 days
fermentation type still, airlock, in 500ml flask
fermentation temp 18 C
starting O2 7.2 mg/l
pitching rate 32 23 15 9 2 M/ml
extract drop per day 1) 3.5 3.7 3.7 3.0 2.8 Plato
final extract 2.7 2.7 2.7 2.8 2.9 Plato
attenuation delta 2)
0.6% 0.6% 0.6% 1.4% 2.1%
yeast growth 36.0 30.7 37.5 33.9 29.3 B
growth per extract 0.77 0.66 0.81 0.72 0.63 B/g

1) the extract drop per day was for the most active part of the fermentation

2) difference between limit of attenuation and actual attenuation

Discussion

The progression of the extract or weight drop during fermentation was as expected: The higher the pitching rate the faster the fermentation start and the greater the extract drop during the most active part of fermentation. This has been observed before and is related to the greater initial yeast population.

It is also well known that beers with lower pitching rates have a more difficult time or take longer to attenuate fully. This was observed as a higher final extract for the beers with the lowest pitching rates compared to the beers with higher initial pitching rates. The differences were not very dramatic, though.

The amount of yeast growth showed a correlation to pitching rate. Higher pitching rates lead to more yeast growth (the initial cell population was considered in this analysis) but the differences in yeast growth were not large. The highest pitching rate yielded about 25% more yeast growth. This might be due to the fact that yeast growth was limited by sterol reserves. A large initial population has more combined sterol reserves than a small initial population which means that it can sustain more cell divisions.

I have not yet tasted the finished beer and also plan to measure the pH of each of these beers at that point.

Yeast Propagator

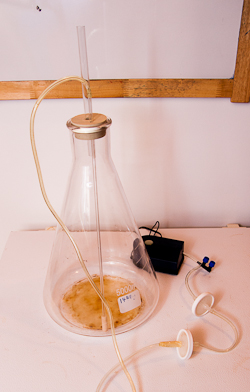
I finally took some pictures of the yeast propagator I built a while back and posted them along with descriptions here: Yeast Propagator

The intend was to enhance the yeast propagation on the stir plate by being able to aerate the starter beer during yeast propagation when the Kraeusen would get in the way of aeration though the vortex of the stirred starter.