10G Brewing

A big part of getting back into brewing has been a brewhouse upgrade from 5 to 10 gallons. Being able to brew 10 gal at a time means brewing less often but also changed my brewing process significantly.

My reverse osmosis system holds only about 5 gal water, which means brewing 10 gal batches requires water collection to start at least one day before brewday.

My current set-up consists of two 15 gal MoreBeer SS brew kettles. I liked the price and the wide bottom of these kettles. I don’t quite like how high the drain is off the bottom, but that can be mitigated. They also don’t have fill level markings and I need to use a calibrated dip stick for that.
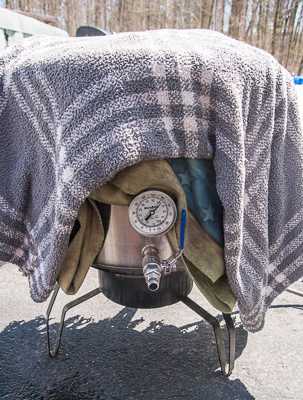
Mash rest with blankets for insulation

Mash rest with blankets for insulation

Just like a German 2 vessel brewhouse, one kettle is used as mash-tun/boil kettle and the other is the lautertun. Covered with a few blankets, a 15 gal mash holds its heat surprisingly well and direct firing the mash-tun allows for efficient temperature adjustment and step mashes. The thick bottom of the kettles greatly reduces the chance of burning the mash even if it is not constantly stirred. The drawback of this set-up is transferring the mash to the lauter-tun. The mash transfer requires scooping most of the mash out of the mash into the lauter tun and then pouring the rest once I’m able to lift the kettle.

Batch-sparging had to give way to fly-sparging. During the first batch I tried batch-sparging, but mixing sparge water into the grain over a false bottom with a huge dead-space, was just not working. It was impossible to get the mash well mixed and the grain. The sparge water is now carefully added in batches and allowed to percolate through the grain. The amount of sparge water is calculated to achieve the desired pre-boil kettle volume. For a while high drain position left a significant amount of wort behind. This was fixed with a barb on the inside and a hose that lays on the lautertun bottom.
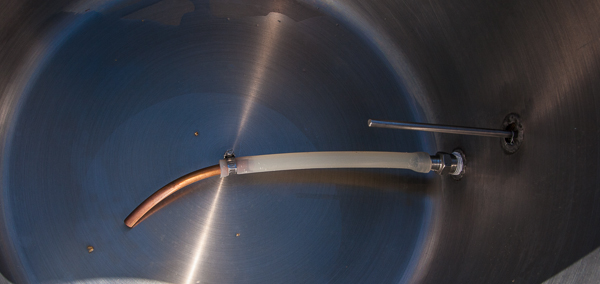
Hose on the inside of the lautertun to maximize wort collection.
Hose on the inside of the lautertun to maximize wort collection.

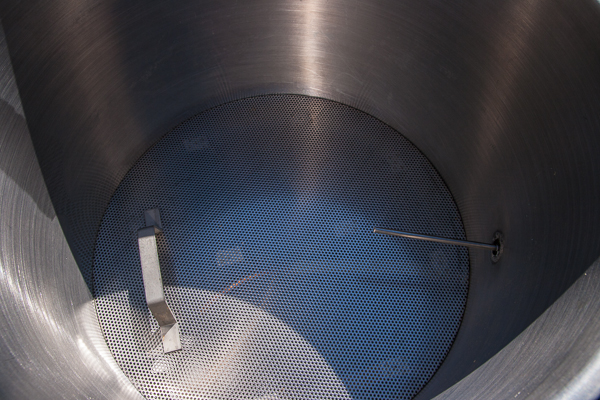
False bottom of the Morebeer 15 gal Brewkettle.
False bottom of the Morebeer 15 gal Brewkettle.

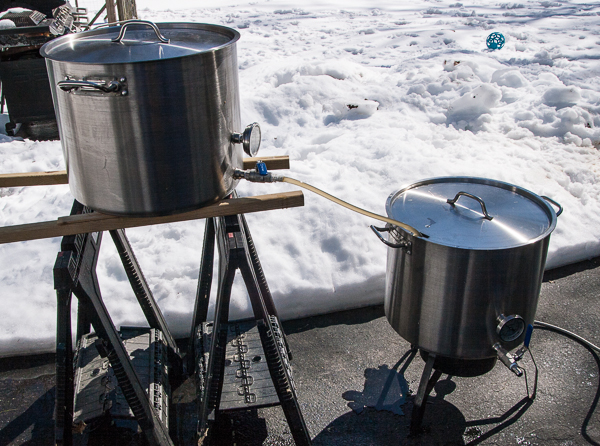
Lautering the mash.

Lautering the mash.

I can easily get 90+% efficiency into the kettle for most beers, which means that sparging must happen evenly and it does not take much longer than running wort through the braided hose of my 5 gal cooler set-up.

The 5 gal brewing process relied heavily on the fact that I could lift the mash, set it aside and use the burner to heat sparge water. That is no longer possible and at least 2 burners are needed, A second burner heats the sparge water in a 15 gal Anvil kettle, which also serves as fermentation vessel.

Where there was an immersion chiller, there is now a plate chiller. An immersion chiller still works for 10 gal batches, but I always dreaded standing over the pot and moving the chiller around. The immersion chiller never brought the wort to pitching temperatures anyway. I needed to lift it into a large tub with ice water for the final chill. A single stage plate chiller doesn’t do that either for me and I’m a bit disappointed about the performance of the plate chiller though. With a reasonably slow wort-flow and a good amount of water the wort temperature drops to only about 40 C (100 F). To get to pitching temperatures I need to float a sanitized bowl or pot filled with ice in the wort.

The wort chilling set-up is sanitized by recirculating hot wort at the end of the boil for a few minutes. After that the wort keeps recirculating but with the water turned on and the wort is allowed to cool do about 90 C (195 F) before whirlpooling it. This lower whirlpool temperature provides less DMS formation and likely better retention of hop aroma for whirlpool hops. The high drain port meant that lots of wort was left behind in the kettle unless the kettle was tipped slightly towards the end. A small stainless steel elbow attached to the drain port from the inside of the kettle mitigated this problem without noticeable interference with the whirlpooling action. A whirlpool stand was not needed for immersion chilled 5 gal batch and adds about 20-30 min time. It does provide a welcome opportunity for late hop additions.
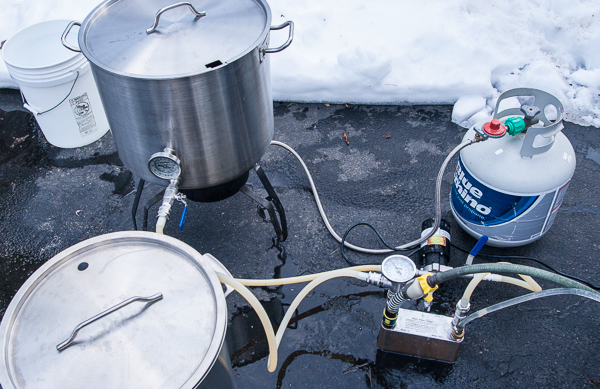
Wort chilling set-up with pump and plate chiller.
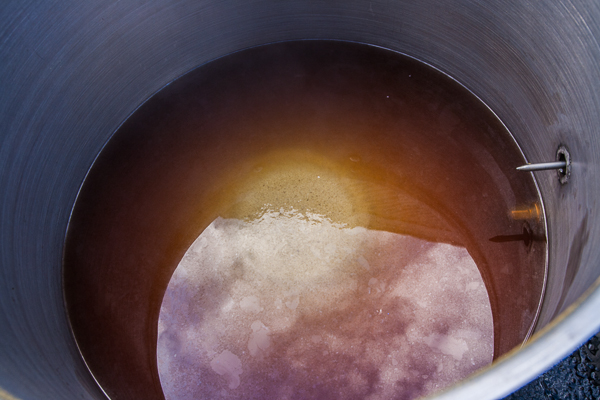
Wort chilling set-up with pump and plate chiller.

Trub cone in the boil kettle. To the left is the stainless steel elbow that is attached to the spigot from the inside.
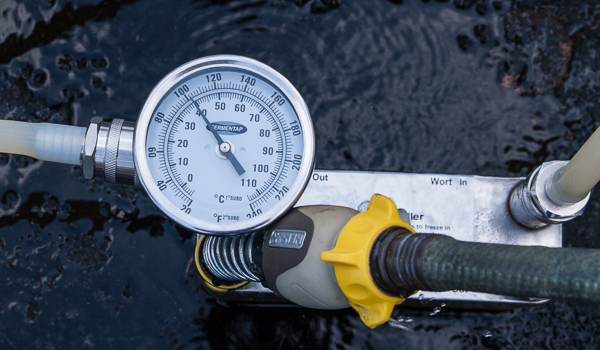
Trub cone in the boil kettle. To the left is the stainless steel elbow that is attached to the spigot from the inside.

Even with moderate wort flow rate and lots of water, the wort temperature drop only to about 40 C (100 F).
Even with moderate wort flow rate and lots of water, the wort temperature drop only to about 40 C (100 F).

Steam sanitation of the HLT which is also used as fermentor.

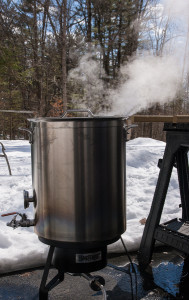
Steam sanitation of the HLT which is also used as fermentor.

The 15g Anvil kettle, that is used as fermentation vessel, is steam sanitized after it is no longer needed as HLT. Steam sanitation is very practical since it can easily kill microbes hiding in cracks of the spigot. But don’t forget about it, boil off all the water and ruin the kettle. Only about a liter of water (or even less) is needed to fill the kettle with 100 C (212 F) steam for about 5 – 10 min.

Having a kettle with spigot as primary fermentor allows for easy skimming of the kraeusen and makes transfer to kegs for secondary fermentation really easy No more starting a siphon. Just attach a hose and open the valve.

Brewing 10 gal batches means twice the amount of beer for one brewday, but not necessarily the same brew time. My 10 gal brewdays are taking longer than my 5 gal brewdays used to. Most of that is because 10 gal batches are slower to heat and transfer than 5 gal.

Back to brewing?

I have been taking a noticeable leave of absence from brewing over the last few years. Once I was done with presenting at the Homebrew Conference in Philly I felt that I had been spending so much of my spare time on brewing that I needed to take a break. A long break. After all, this is just a hobby and if that’s true I should be able to stop anytime I want. Deadlines are something left to my day job.

At said day job, responsibilities were also picking up and combined with other hobbies that left little time for brewing science and and brewing itself. While I brewed on and off to keep myself from buying every beer I drank, it felt more like a chore than a hobby.

Key to having fun brewing again was the move to 10 gal batches instead of 5. That reduces down the number of brewdays needed to supply myself to just one or two sessions per month with a nice opportunity for doing split batch fermentation experiments. And getting a 10 gal system to work efficiently is a whole new challenge. More on that in future posts

While I don’t want to jump back into the frenzy of brewing message boards, I might find the time to attend to some of the unanswered emails and comments.

At the time of writing this I’m enjoying a home brewed American Stout. I’m starting to like dark beers now and I had, and still have, a whole lot of dark grain samples from my malt pH experiments.

Cheers.

I’m Brewing Again

I updated the look of the Braukaiser blog and never posted again. Until now.

After last year’s NHC and the work I did on yeast growth I just felt that I needed to take a break and take it easy with the brewing hobby for a while. And I did. And I ran out of home brew and had to buy beer at the store again, ouch. But a week ago I finally brewed again to get the pipeline started. Except for the temperature, I did not take a single measurement on that beer. No OG, no pH, no Fast Ferment Test. I used dry yeast and I may not even test the FG. But I brewed again!

So hopefully I may even come up with some interesting posts in the near future.

New Look

I decided to change the theme of the blog once again. I wasn’t to happy with the old theme and it also had some formatting bugs. Furthermore it wasn’t too well supported. So I decided to go with one of the standard WordPress themes. That will make maintenance and modifications much easier. The blog’s layout also looks much cleaner now. Let me know in case I broke something. One issue I know about is the missing side-bar on mobile devices. It’s actually not missing, it’s all the way at the bottom.

NHC 2013 presentation

My presentation at the NHC today was very well received. Yeast growth in starters does interest a lot of brewers and I had a lot of new data to present. Now that I finished the presentation I can devote more time on experiment documentation here on braukaiser.com.

A copy of the presentation can be found here.

Posted Wiki Article on Building a PWM Controlled Stir Plate

I finally finished an article on building a PWM (Pulse Width Modulation) controlled stir plate: PWM stir plate design. Building the control logic was a fun project for me since building electronic circuits was a hobby of mine before I got a job in the computer industry. Many years after I build my first stir plate I once again looked into building a stir plate  because needed more stir plates for the yeast starter experiments I’m doing.  I knew I needed better fan speed control than using linear voltage controller since it was really hard to control the fan speed in my old stir plate design. PWM control does work much better but takes a few more parts and soldering skills.

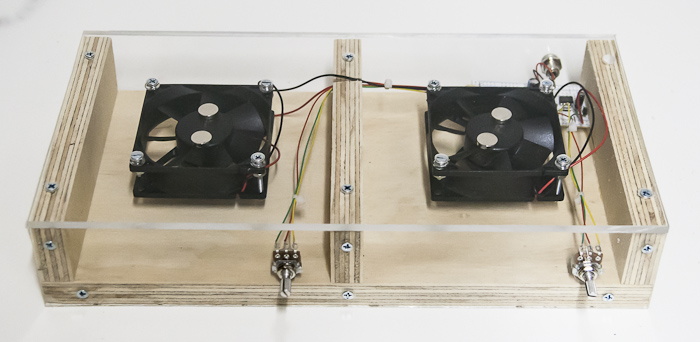
PWM controlled double stir plate

Hop drying at home

Recently I gave a pack of my homegrown hops to a friend of mine who regularly brews at a Deja Brew, a Brew on Premise place in Shrewsbury Mass. The quality of the hops, including the fact that they retained their fresh green color, was especially noted by the owner who commonly sees customers with poorly dried and stored home grown hops. So I decided to outline my process here. While this process may be standard operating procedure for most of my regular readers there might still be a few pieces of new information here and there.

When to pick

Hops grown in he Northeast are generally ready to pick towards the end of August. What I’m looking for are well developed lupulin glands, the yellow grains at the base of the cone’s leaves, a distinct fresh hop aroma when rubbed between palms and a papery/springy feel when the cone is squeezed. A few cones may already have brown tips on their leaves. The time window for picking them might be 1 to 2 weeks.

It is important that hops are not picked too early since, just like fruit, hop cones ripen and develop some of their characteristic flavor later in their life. This includes the synthesis of sesquiterpenes Humulenne and Caryophyllene, which are the 2nd and 3rd largest constituent of the hop oil. The major constituent, mycrene, is already produced in young cones.  1)

When I’m ready to pick cones I don’t pick them selectively. I generally cut off pieces of the bine, as hop “vines” are called, starting from the top so I can stop when enough cones were picked. All cones are generally picked within a week.

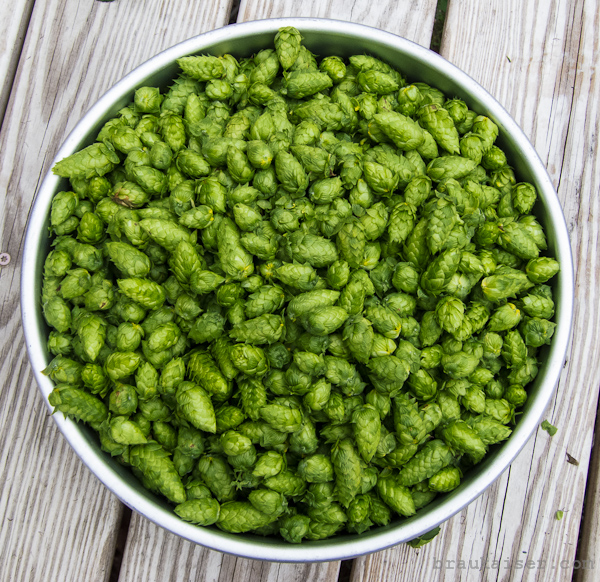
Freshly picked hops

How to dry

In order to prevent rotting, the picked hops need to be dried immediately. And when it comes to hop drying, we home hop growers actually have an advantage over commercial growers. This advantage lies in the ability to dry hops with ambient air temperature. Some of the hop oils we are trying to preserve have flash points around 100 F (40 C) and the application of heat during drying would volatilize and drive them off 2). In fact I seem to be getting better and different aromas from my home grown Cascade compared to store bought Cascade.

In my opinion, drying is best done using a dedicated oast. Some brewers dry hops in the oven, which I don’t recommend due to the high temperatures. Others spread the hops on window screens. I don’t like that option since it takes up lots of space.

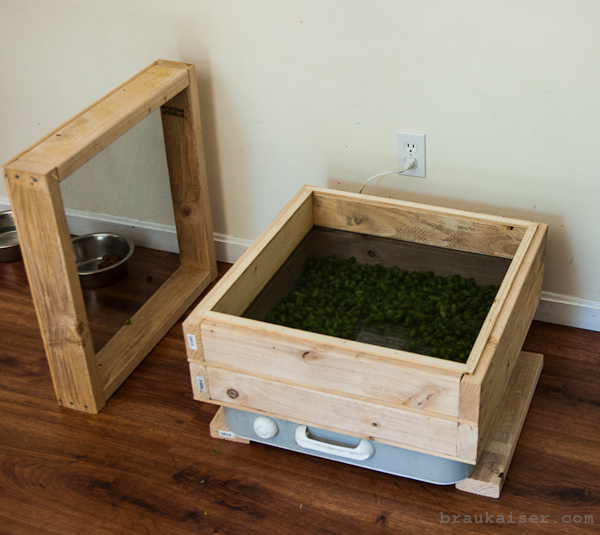
The hop oast I built is very simple. It consists of racks build from 2x4s and window screen that can be stacked on top of each other and placed on top of a window box fan. The fan blows air through the hops from the bottom and I place the least dry batch on the top and the most dry batch on the bottom. Since the air is forced through the hops they can be packed more tightly and the whole contraption does not take up much space. A batch of hops dries within 3 days in that oast.

Hops are dry enough once you can squeeze a handful and they do not feel damp anymore. In addition to that the stem should easily snap. This is the part that takes the longest to dry.

simple oast for efficient hop drying

Packaging and storage

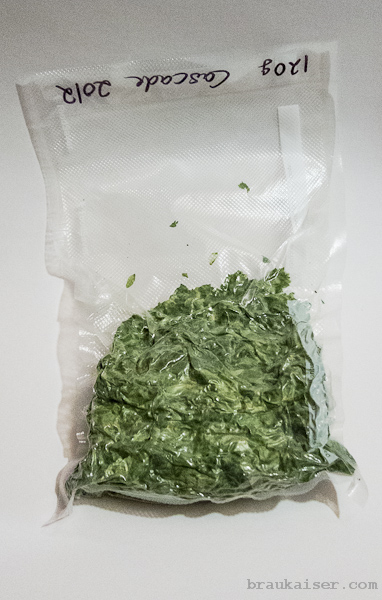
Vacuum packed dried hops

Hops are best stores in a vacuum sealed package. I highly recommend the investment into a vacuum sealer like the FoodSaver line of products. Oxygen is the main enemy of hops and while a vacuum sealer does not eliminate oxygen it greatly reduces oxygen during hop storage. I generally make 120 g (4 oz)  packs of hops.  It’s useful to make the hop bag larger than it needs to be for two reasons. First, it makes it easier to stuff the rather bulky dried hop coned into the bag and second, the bag can easily be vacuum packed and re-sealed once opened. I also recommend labeling the hops bag an the end that will not be cut off and not like it is done in the picture on the right.

Hops should be stored in the freezer since the low temperatures slow staling reactions. This also keeps them out of the light.

If you follow these recommendations you will see that the quality and shelf life of your home grown hops is on par or better compared to store bought hops.

Due to the unknown of the actual alpha acid content, home grown hops are best used as late hop additions for for dry hopping.

Update:

A few weeks after writing this I listened to a great Basic Brewing Radio interview with Dan Dettmers of Gorst Valley Hops. Look for the September 27, 2012 eposide in the 2012 list of episodes.

References:

1) Peter Wolfe, A Study of Factors Affecting the Extraction of Flavor when Dry Hopping, 2012

2) Joseph Wegner, Gorst Valley Hops, The Science Behind the Art: Hops in Brewing, presentation at the 2010 American Homebrewers Conference


ANHC 2012 – recap

I know I have been quiet for a while now but for a reason. I have been busy with experiments, brewing and building brewing related stuff. However I want to take the time to give an update on ANHC-three, the Australian home brewer’s conference held in Melbourne, Victoria past October.  First off, a big thanks to the organizing committee to that invited me to speak at the conference.

The actual conference lasted two days for me since I did not attend Industry Day (in hindsight I think I should have because it the program looked very interesting, but I toured Melbourne with my wife instead). I had presentations on both days and even though I did practice my presentations while commuting, I was a bit nervous. But any stage fright was quickly cured by samples of beer that were handed out during the presentation starting at 9:30a. I enjoyed that most presentations had beer samples. This is not as common at the US home brew conference.

My talks about lager brewing and wort fermentability control in mashing were very well received.

The only downside to the conference was that there were too many good topics and I had to make a few difficult choices between presentations being given at the same time. But luckily the presentations from the main auditorium have been recorded on video and will be available on DVD.

The creativity price for presentations goes to Stu McKinlay from Yeastie Boys for having a hand drawn slide deck.

Gala Dinner and Club Night were lots of fun, though staying up late was a challenge during the early days of the drip due to the considerable time difference of 9 hrs.

Club Night

Club Night

My wife and I spent and additional 2 days after the conference to drive along Great Ocean Road and take in its spectacular scenery. Now she want’s me to find a job there so we can move to Australia. But first I would have to pay a speeding ticket. $176 for going 106 km/h when the limit was 100 km/h. I thought I was obeying the speed limits all the time but had no idea even 6 km/h can get you a ticket. Ouch.

Southern Ocean and Victoria cost along the Great Ocean Road

Southern Ocean and Victoria cost along the Great Ocean Road

Brewer’s Friend

By now frequent visitors should have noticed the Brewer’s Friend links on the sidebar of the blog and the wiki. Brewer’s Friend is a cloud based recipe editor and set of brewing calculators. I have  been collaborating with Larry, the mastermind behind Brewer’s Friend, to include much of the brewing science and calculations I have been working on over the years. Having them in stand-alone spreadsheets is fine, but being able to use them in one integrated software solution is even better.

So far Brewer’s Friend has added support for Plato (since that’s what I’m using) and calculation of conversion efficiency. Check it out and stay tuned for more cool features.